As any seasoned builder or survivalist in the world of Minecraft knows, managing a growing menagerie of animals can quickly become a chaotic endeavor. We have all been there—trying to distinguish your favorite tamed wolf from a pack or accidentally losing track of a rare mob in a crowded farm. Historically, securing a name tag was a stroke of luck, often requiring hours of spelunking in dangerous ruins. At Digital Tech Explorer, we are always on the lookout for ways to streamline your gaming experience, and the latest updates have introduced a feature that players have requested for years: the ability to craft name tags.
Naming your Minecraft mobs makes it much easier to keep track of your digital companions as they grow.
Before this “Tiny Takeover” update, these elusive items were restricted to high-tier loot chests in Woodland Mansions, Dungeons, and Mineshafts. Here at Digital Tech Explorer, we believe technology—even in a voxel world—should be accessible. The introduction of a direct crafting recipe is a massive quality-of-life improvement. Despite their legendary rarity in the past, the components required to create them are surprisingly common. Here is how you can master this essential PC gaming mechanic.
The Recipe: How to Craft a Name Tag
To forge your own name tag, you only need two basic components. This simplicity ensures that both novices and veterans can begin labeling their world immediately.
Required Material
Quantity
Compatibility
Paper
1
Standard Paper
Metal Nugget
1
Iron, Copper, or Gold
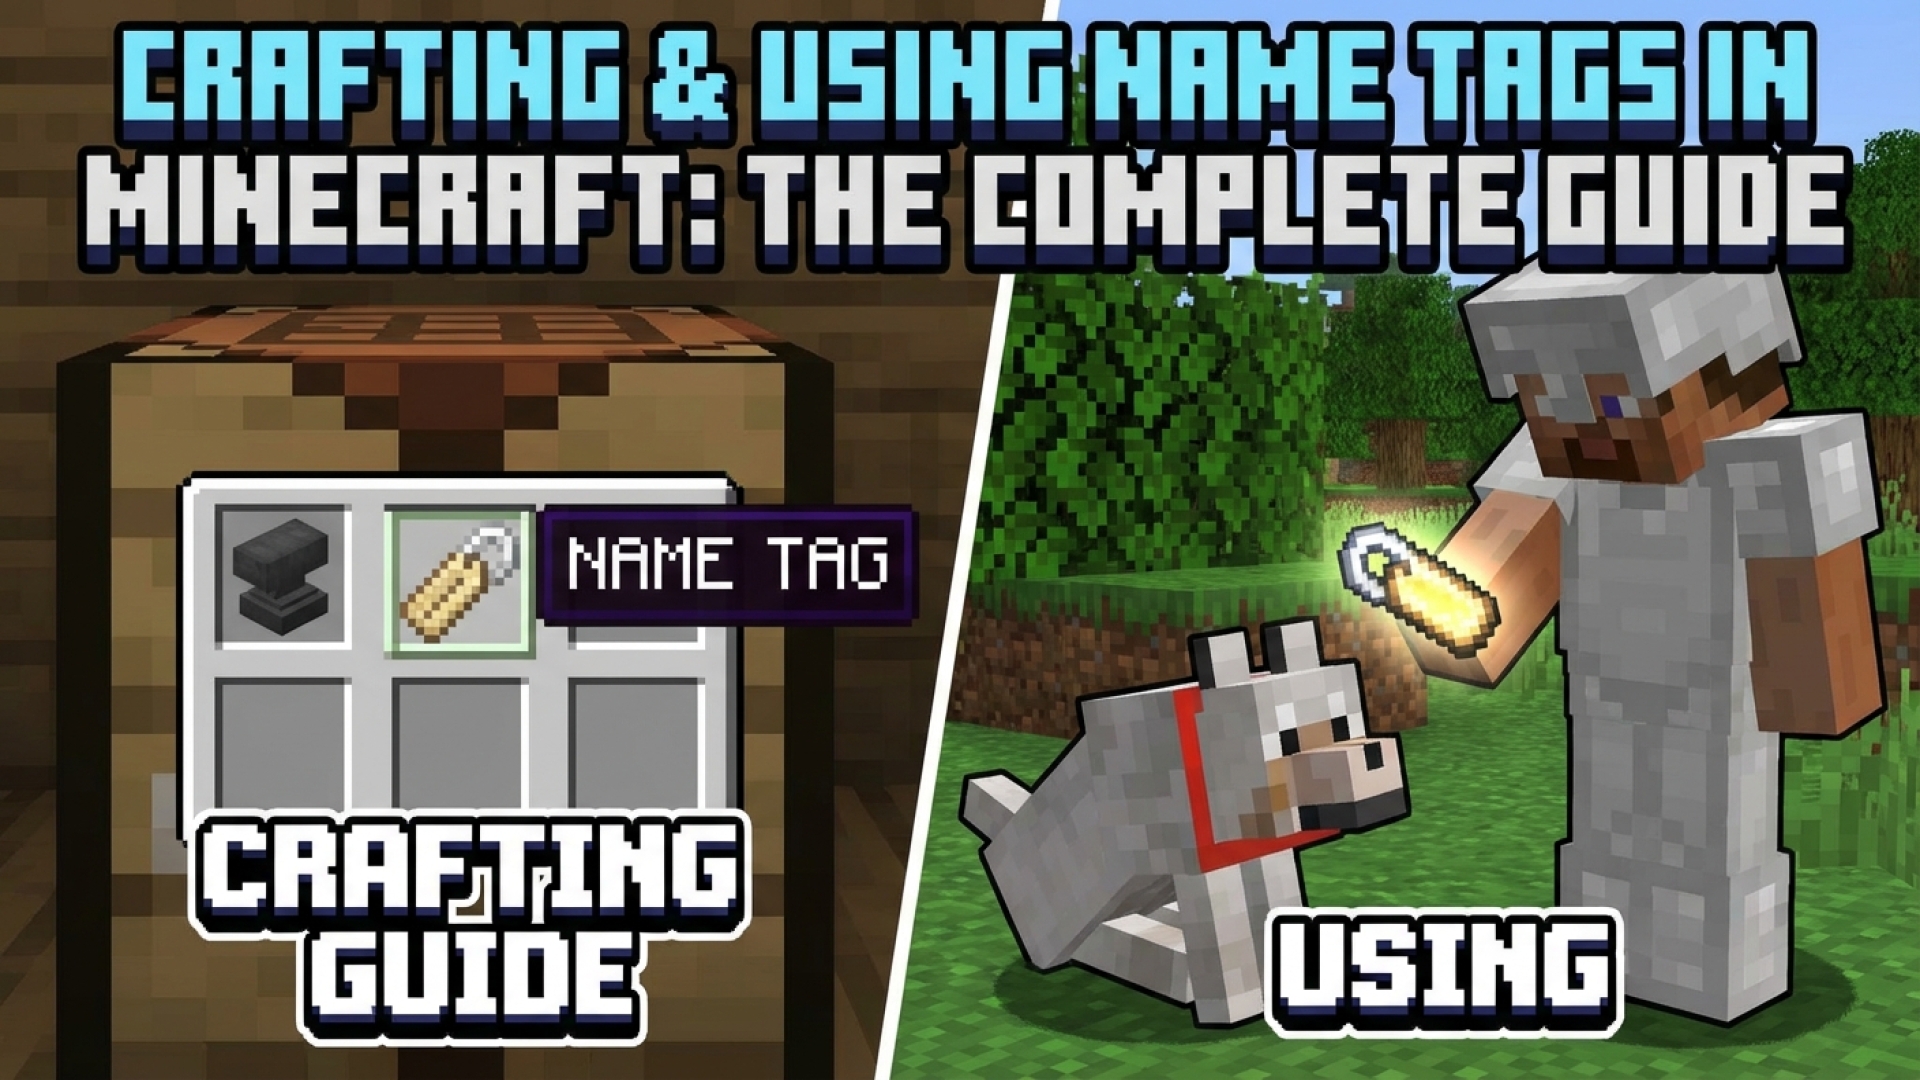
Everything you need to craft a Name Tag in your inventory.
The crafting arrangement is intuitive and requires minimal resources.
To begin, open your crafting grid. Place your chosen metal nugget in one of the top corners and position the paper in the square diagonally below it. You will see the name tag appear instantly in the output slot. One of the best features of this recipe is its versatility; whether you use iron, copper, or gold, the resulting item remains the same. There is no difference in durability or function, allowing you to use whatever resources you have in abundance.
Furthermore, because this recipe only occupies two spaces, you can craft it directly within your character’s 2×2 inventory grid. There is no need to hunt for a crafting table, making it a perfect “on-the-go” solution for explorers.
Personalizing Your World: Using the Name Tag
Once you have crafted your tag, the next step involves a bit of digital customization. To assign a name, you must use an anvil. Follow these steps to ensure success:
Access the Anvil: Place your name tag into the first slot of the anvil interface.
Enter the Name: Use the text box to type the specific name you want for your mob.
Collect the Item: The renamed tag will appear in the output slot on the right.
Note that this process requires a small amount of Experience (XP). If the item does not appear in the output slot, check your level bar to ensure you have at least one enchantment level available.
With the customized tag in hand, simply approach your target mob and right-click. The name will instantly appear above its head. While this offers incredible creative freedom, keep in mind that the item is consumed upon use and cannot be retrieved. Additionally, while most creatures are fair game, the Ender Dragon and other players are immune to being named via this method.
At Digital Tech Explorer, we love how these small updates can transform the way we interact with virtual environments. Whether you are naming a trusty steed or organizing a massive iron golem security force, this new crafting capability is a game-changer for the Minecraft community.