
Essential Preparation: The Electrical Component
Before you drop into the zone, ensure you have one Electrical Component in your inventory. While you can scavenge for these in the field within Electrical areas, it is far more efficient to bring one with you. You can craft these at a Refiner using plastic and rubber, or by recycling high-tech loot like Wasp/Hornet Drivers or Snitch Scanners.
Step 1: Repair the Robotic Sandbox Terminal
Your first stop is the Control Room situated between Robotic Sandbox A and B. This area is elevated; if you are currently on the floor of Sandbox A, look for the construction lift to take you up to the walkway. Following the yellow signage is usually the safest way to navigate the stairwells.
Once inside the Control Room, locate the out-of-service terminal. In my testing, the most reliable terminal is located on the southeast side overlooking Sandbox B, right next to the heptagon-shaped desk. Interact with it to consume your Electrical Component and complete the repair.
Step 2: Enable Power in the Conduit Backroom
Next, descend into the hallways connecting Sandbox A and B. You are looking for a specific door labeled Control Room B2, located near the ramp leading south from Sandbox B (close to the Raider Hatch). This is a “conduit backroom.”
Head inside and find the main power switch positioned between the server stacks. Pull the lever to restore power. Because this area is often a bottleneck for other players, move quickly and keep your ears open for incoming Raiders.
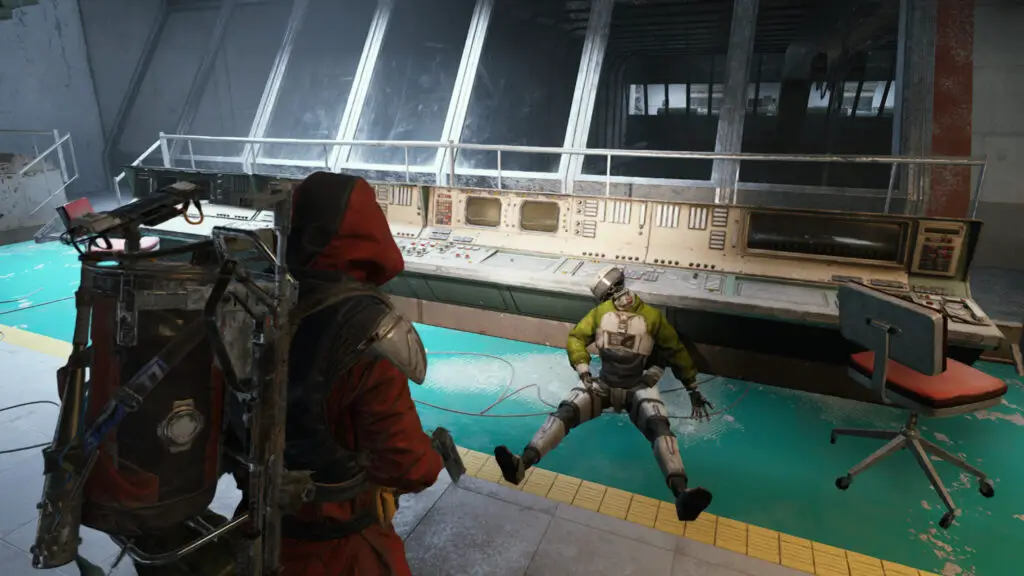
Step 3: Boot the Mainframe in Cultural Archives
The final objective takes you to the Cultural Archives on the far east side of the map. You can reach this via the Business Center or the Atrium. This area is notorious for being infested with Shredders, so approach with caution and a high-capacity magazine.
Search for the small room that juts out toward the center of the Cultural Archives. Inside, you will find the mainframe computer desk. Interact with the terminal to finalize the data boot. Once this is done, your objectives are complete.
Rewards and Extraction
Since the quest objectives save upon completion, you do not need to carry a specific quest item to extract. Simply find the nearest safe exit. Upon returning to base, Shani will reward your efforts with three Showstoppers and three Trailblazers. While the rewards are modest, the experience gained and the progression through the questline are vital for unlocking higher-tier gear.

Looking for more ways to optimize your PC gaming experience? Check out our other specialized guides for Arc Raiders:
- Arc Raiders Roadmap: Stay updated on the 2025 release cycle.
- Best Raider Skills: A breakdown of the most effective builds for solo survival.
- Weapon Tier List: Which firearms provide the best TTK against ARC machines?
- Expeditions Guide: How to successfully retire your Raider and claim your rewards.
- Weather Monitor Project: Learn how to mitigate environmental hazards during your runs.
For more in-depth tech analysis and gaming guides, visit the TechTalesLeo author page at Digital Tech Explorer.
Completing the Fragmented Logs quest in Arc Raiders can be a daunting task, even for seasoned scavengers. The mission sends you deep into the heart of Stella Montis’ most dangerous zones, navigating a map that often feels more like a lethal maze than a tactical battlefield. However, as someone who spent years analyzing software logic and game mechanics, I can tell you that the key to surviving this quest is preparation and a clear pathing strategy.
The good news? You don’t need to finish every objective in a single extraction. If things get too heated, focus on one terminal and get out alive. Here is our comprehensive guide to mastering the Fragmented Logs quest and navigating the Robotic Sandbox with ease.
| Objective | Location | Requirement |
|---|---|---|
| Repair Terminal | Robotic Sandbox Control Room | 1x Electrical Component |
| Enable Power | Conduit Backroom (Sandbox B2) | Manual Interaction |
| Boot Mainframe | Cultural Archives | Manual Interaction |
Essential Preparation: The Electrical Component
Before you drop into the zone, ensure you have one Electrical Component in your inventory. While you can scavenge for these in the field within Electrical areas, it is far more efficient to bring one with you. You can craft these at a Refiner using plastic and rubber, or by recycling high-tech loot like Wasp/Hornet Drivers or Snitch Scanners.
Step 1: Repair the Robotic Sandbox Terminal
Your first stop is the Control Room situated between Robotic Sandbox A and B. This area is elevated; if you are currently on the floor of Sandbox A, look for the construction lift to take you up to the walkway. Following the yellow signage is usually the safest way to navigate the stairwells.
Once inside the Control Room, locate the out-of-service terminal. In my testing, the most reliable terminal is located on the southeast side overlooking Sandbox B, right next to the heptagon-shaped desk. Interact with it to consume your Electrical Component and complete the repair.
Step 2: Enable Power in the Conduit Backroom
Next, descend into the hallways connecting Sandbox A and B. You are looking for a specific door labeled Control Room B2, located near the ramp leading south from Sandbox B (close to the Raider Hatch). This is a “conduit backroom.”
Head inside and find the main power switch positioned between the server stacks. Pull the lever to restore power. Because this area is often a bottleneck for other players, move quickly and keep your ears open for incoming Raiders.
Step 3: Boot the Mainframe in Cultural Archives
The final objective takes you to the Cultural Archives on the far east side of the map. You can reach this via the Business Center or the Atrium. This area is notorious for being infested with Shredders, so approach with caution and a high-capacity magazine.
Search for the small room that juts out toward the center of the Cultural Archives. Inside, you will find the mainframe computer desk. Interact with the terminal to finalize the data boot. Once this is done, your objectives are complete.
Rewards and Extraction
Since the quest objectives save upon completion, you do not need to carry a specific quest item to extract. Simply find the nearest safe exit. Upon returning to base, Shani will reward your efforts with three Showstoppers and three Trailblazers. While the rewards are modest, the experience gained and the progression through the questline are vital for unlocking higher-tier gear.
Looking for more ways to optimize your PC gaming experience? Check out our other specialized guides for Arc Raiders:
- Arc Raiders Roadmap: Stay updated on the 2025 release cycle.
- Best Raider Skills: A breakdown of the most effective builds for solo survival.
- Weapon Tier List: Which firearms provide the best TTK against ARC machines?
- Expeditions Guide: How to successfully retire your Raider and claim your rewards.
- Weather Monitor Project: Learn how to mitigate environmental hazards during your runs.
For more in-depth tech analysis and gaming guides, visit the TechTalesLeo author page at Digital Tech Explorer.